Beranda > Artikel
How to Make a Simple Earthquake Resistant House
 Earthquakes that often occur in Indonesia have caused public panic. In connection with this, the public needs to know about the construction of houses that follow the rules of earthquake-resistant buildings. Here's how to make a simple earthquake-resistant house described by Nanang Gunawan W. ST MT, Lecturer of the Department of Civil Engineering, Faculty of Engineering, Universitas Jenderal Soedirman (Unsoed) Purwokerto:
1. Building Plan Planning
The building plan is made simple and symmetrical, not too many protrusions (maximum 25% of the longest side of the protrusion direction). Examples of symmetrical plans are rectangles and circles. As far as possible the area not for doors and windows is also made symmetrical, not centered on one side only.
2. Foundation and Sloof Planning
The foundation must be resting on a fairly hard soil. For river stone foundations, the minimum depth is 50 cm and are made continuously and cover each other. The shape of the river stone foundation is a trapezoid with a minimum bottom width of 50 cm and an upper width of 20 to 20 cm. 30 cm. The sloof is installed right above the river stone foundation. Sloof dimensions 15 x 20 cm (width x height), must be connected to the foundation. The connection system uses 4 pieces of 10 reinforcing iron anchors and a length of 60 cm which is bent for 12 cm at both ends shaped like the letter Z. The anchors are installed every 1.5 to 2 m. The sloof reinforcement uses a minimum diameter of 8 as many as 4 pieces with iron begel 6 with a size of 8 x 12 cm2 with a maximum distance of 15 cm.
3. Practical Column Planning
Practical columns function as wall binders to be strong against lateral loads. Practical columns are installed a maximum of every 3 m, each corner must also be installed practical columns. The meeting between the frame and the wall should also be installed practical columns. Practical column reinforcement uses a minimum of 8 reinforcing iron with iron begel 6 with a size of 8 x 10 cm2 with a maximum distance of 15 cm.
4. Ring Beam Planning
The ring beam is installed at the end of the wall mount. As in the sloof, ring beams are installed continuously and close to each other. The dimensions and reinforcement of the ring beam are the same as the sloof. At each corner of the wall meeting, the ring beam should be made rigid by adding a ring beam diagonally at that angle.
5. Wall Planning
Walls can use red brick or light brick. The principle of wall installation is that the system is sigsag and is always constrained from the outside by sloof, practical columns, and ring beams. The maximum confined area of ??the wall is 9 m2. So if the wall height is 3 m, then the maximum practical column distance is 3 m. The anchorage of the wall is carried out every 1 m using 8 iron 50 cm long bent at both ends which is connected to practical columns and ring beams.
6. Roof Frame Planning
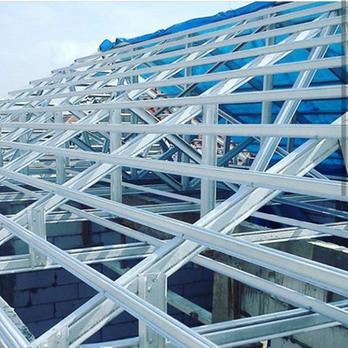
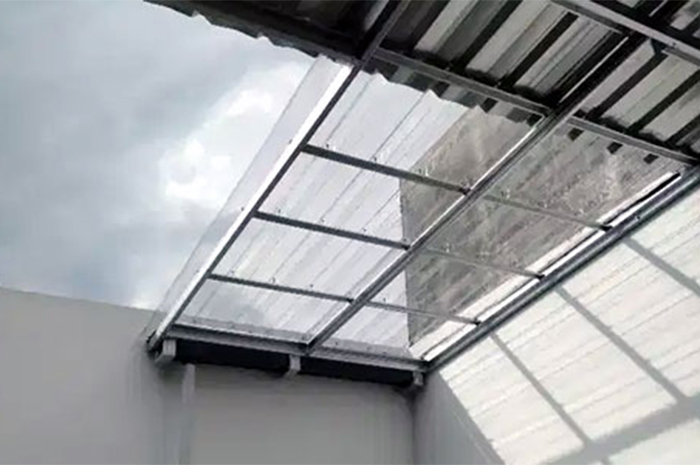
The roof frame used usually uses mild steel or wood. If using mild steel the distance between the horses is a maximum of 1.2 m. If using wooden truss the maximum distance can be up to 3 m, depending on the load of the roof covering using tile or metal. The heavier the distance the horses will be smaller too. In wooden truss, the connection between the elements usually uses nails. The size of the nails used is 2 times the minimum thickness of the wood to be connected. The principle of using roof covering material is as light as possible such as metal roof tiles, so that it will reduce the load acting on other structural elements.
7. Connection of Reinforcement Between Elements
The principle of connecting reinforcement between elements is a rigid connection. To make a rigid connection, each end of the reinforcement that will function as a connection between elements is bent 90o along 12 x the diameter of the reinforcement or if it is bent 180o along 4x the diameter or 60 mm.
8. Material use
The sand used must be clean sand with a maximum silt content of 5%. A simple way to calculate the mud content is to take a sample of sand and then open it to dry and weigh it, then wash the sand and reopen it and then weigh it. Sludge content is the difference between the initial weight and the weight after washing divided by the initial weight multiplied by 100%. If the silt content of the mud is still above 5%, then the sand needs to be washed first or replaced with cleaner sand. The water requirement used is clean water from chemical elements, especially sulfate and chlorine. The water used is well water, not rain water or salt water (sea). The mixture used is a mixture of 1 PC: 5 Sand. With the amount of water to taste is not too much. This mortar is used for the installation of river stone foundations, bricks, and stucco. For concrete mix, use a mixture of 1 PC: 2 Sand: 3 Crushed stone (split). The amount of water used is between 0.5 s.d. 0.6 of the weight of cement used.
 Bahasa Indonesia
  Inggris
 Bahasa Indonesia
  Inggris
 Earthquakes that often occur in Indonesia have caused public panic. In connection with this, the public needs to know about the construction of houses that follow the rules of earthquake-resistant buildings. Here's how to make a simple earthquake-resistant house described by Nanang Gunawan W. ST MT, Lecturer of the Department of Civil Engineering, Faculty of Engineering, Universitas Jenderal Soedirman (Unsoed) Purwokerto:


