 Bahasa Indonesia
  Inggris
 Bahasa Indonesia
  Inggris
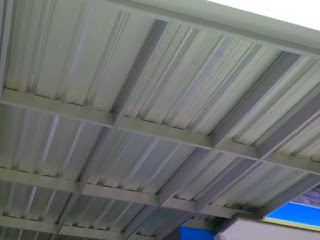
 Spandek roof is also known as galvanized roof or aluminum coated steel roof. This spandex roof is made of stainless steel with a corrugated surface. This roof is claimed to have a resistance of 4 times stronger than a galvanized steel roof of the same thickness. Basically, a spandex roof is made of 55% aluminum, 43% zinc, and 2% silicon. Apart from having high resistance to corrosion, spandex roofs are also flexible.
In general, spandex roof is applied to business buildings such as warehouses, factories, shop houses, malls, and others. The size on the market varies greatly with a thickness level of around 0.3-0.5 mm and a wide choice of colors. This roof can be applied with a gording distance of about 120 mm. Based on its durability, spandek roofs are considered one of the most durable types of roofs because they can last for more than 20 years.
The use of spandex roofs has many advantages, including:
- Has good resistance to corrosion
- Has anti-termite and other destructive properties
- The building design looks more modern and futuristic
- Needs a little because the expanse is wide
- Various colors and not easy to fade
- Stronger and sturdier profile structure
- Affects the function of the building
- The material is more effective and efficient
Here are the practical steps for installing a spandex roof for good and maximum results!
1. Pedestal Distance Measurement
Do the measurement job well in order to get precise and accurate results. You need to find out how much space is available and how much spandex roof to use. You also need to determine the width of the spandex roof that is suitable for use. After all this data has been collected, then take measurements of the pedestal distance that will be required by the spandex roof.
2. Making Easel Designs
To install a spandex roof, you can use lightweight steel trusses or galvalume. In doing so, you need to pay attention to factors such as the ability of the horses to withstand loads, the level of roof slope, and the determination of the length of the top chord. Do the calculation of the design of this spandek roof truss correctly. Mistakes that occur in the planning of the horses will make the spandex roof prone to collapse.
3. Easel installation
After the design of the truss has been made, now is the time to implement the design into its real form. But first you need to put on protective clothing for safety first. It is highly recommended to wear pants and shirts with long sleeves, gloves, and protective glasses. Then you can start installing the truss to support the spandex roof.
4. Installation of Steel Battens
If the truss has been completed with a stretch that is confirmed to be sturdy, the next step is to install steel battens. This batten will later become the support of the spandex when installed as a roof. Therefore, the installation of battens must be adjusted to the width of the spandex roof you are using. This batten distance can be adjusted according to the spandex width. Do the work of making this batten carefully and make sure the position is straight.
5. Spandek Roof Installation
Now is the time to install the spandex roof on the lightweight steel roof truss that has been completed. The installation process is more or less the same as for other types of metal roofing. Here you need a special screw equipped with a rubber head to prevent water seepage. This screw installation can be done using an electric drilling machine with a suitable drill bit to make it easier and faster to complete.
6. Checking Work Results
Don't forget to check the results of your work that has been completed. Evaluation of the results of the installation of this spandex roof is very important to ensure that everything is properly installed. If there are components that are not installed correctly, you should fix them quickly so that problems do not occur in the future. So that your work produces optimal results.


